Setup wizard
Where in the admin: the wizard is a standalone page at
/setupshown only until the first administrator exists. Afterwards the same checks live under System › Admin › Start (/setup).
The wizard turns a fresh installation into a working panel in four short steps. It is served on port 3000 (http://<server-IP>:3000/setup) or, when TLS is already active, at https://<domain>/setup.
The wizard disappears after step 3
Once the administrator is created the wizard is closed and the setup code is deleted. To reach the panel afterwards use the admin console.
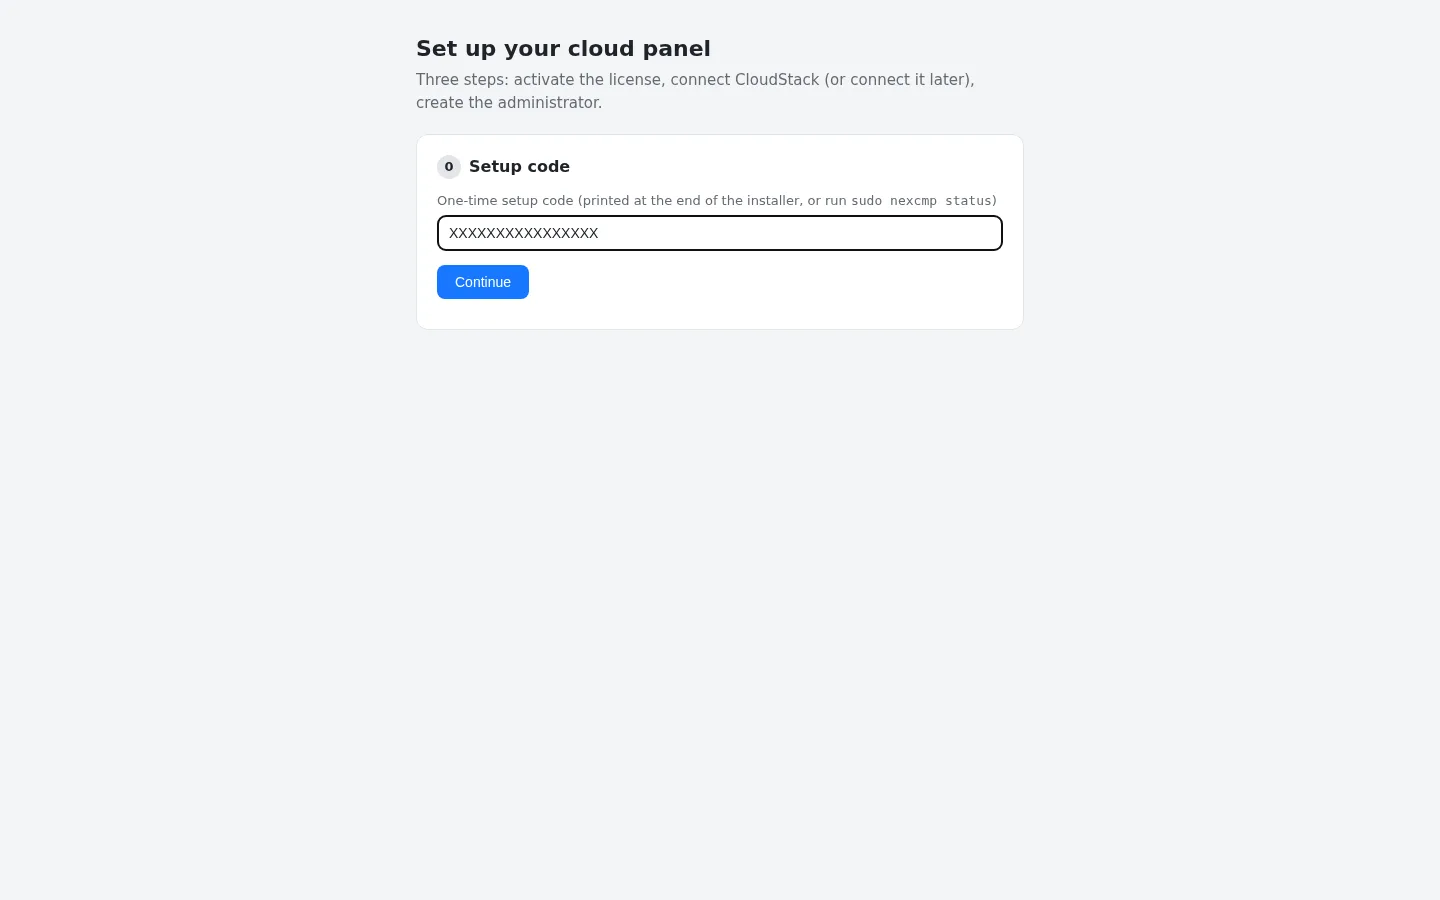
Step 0 — Setup code
The installer prints a one-time setup code at the end. You can read it again with:
bash
sudo nexcmp statusPaste it into Setup code and click Continue. The code protects the wizard: nobody who finds the open port can create the administrator without it.
Step 1 — License
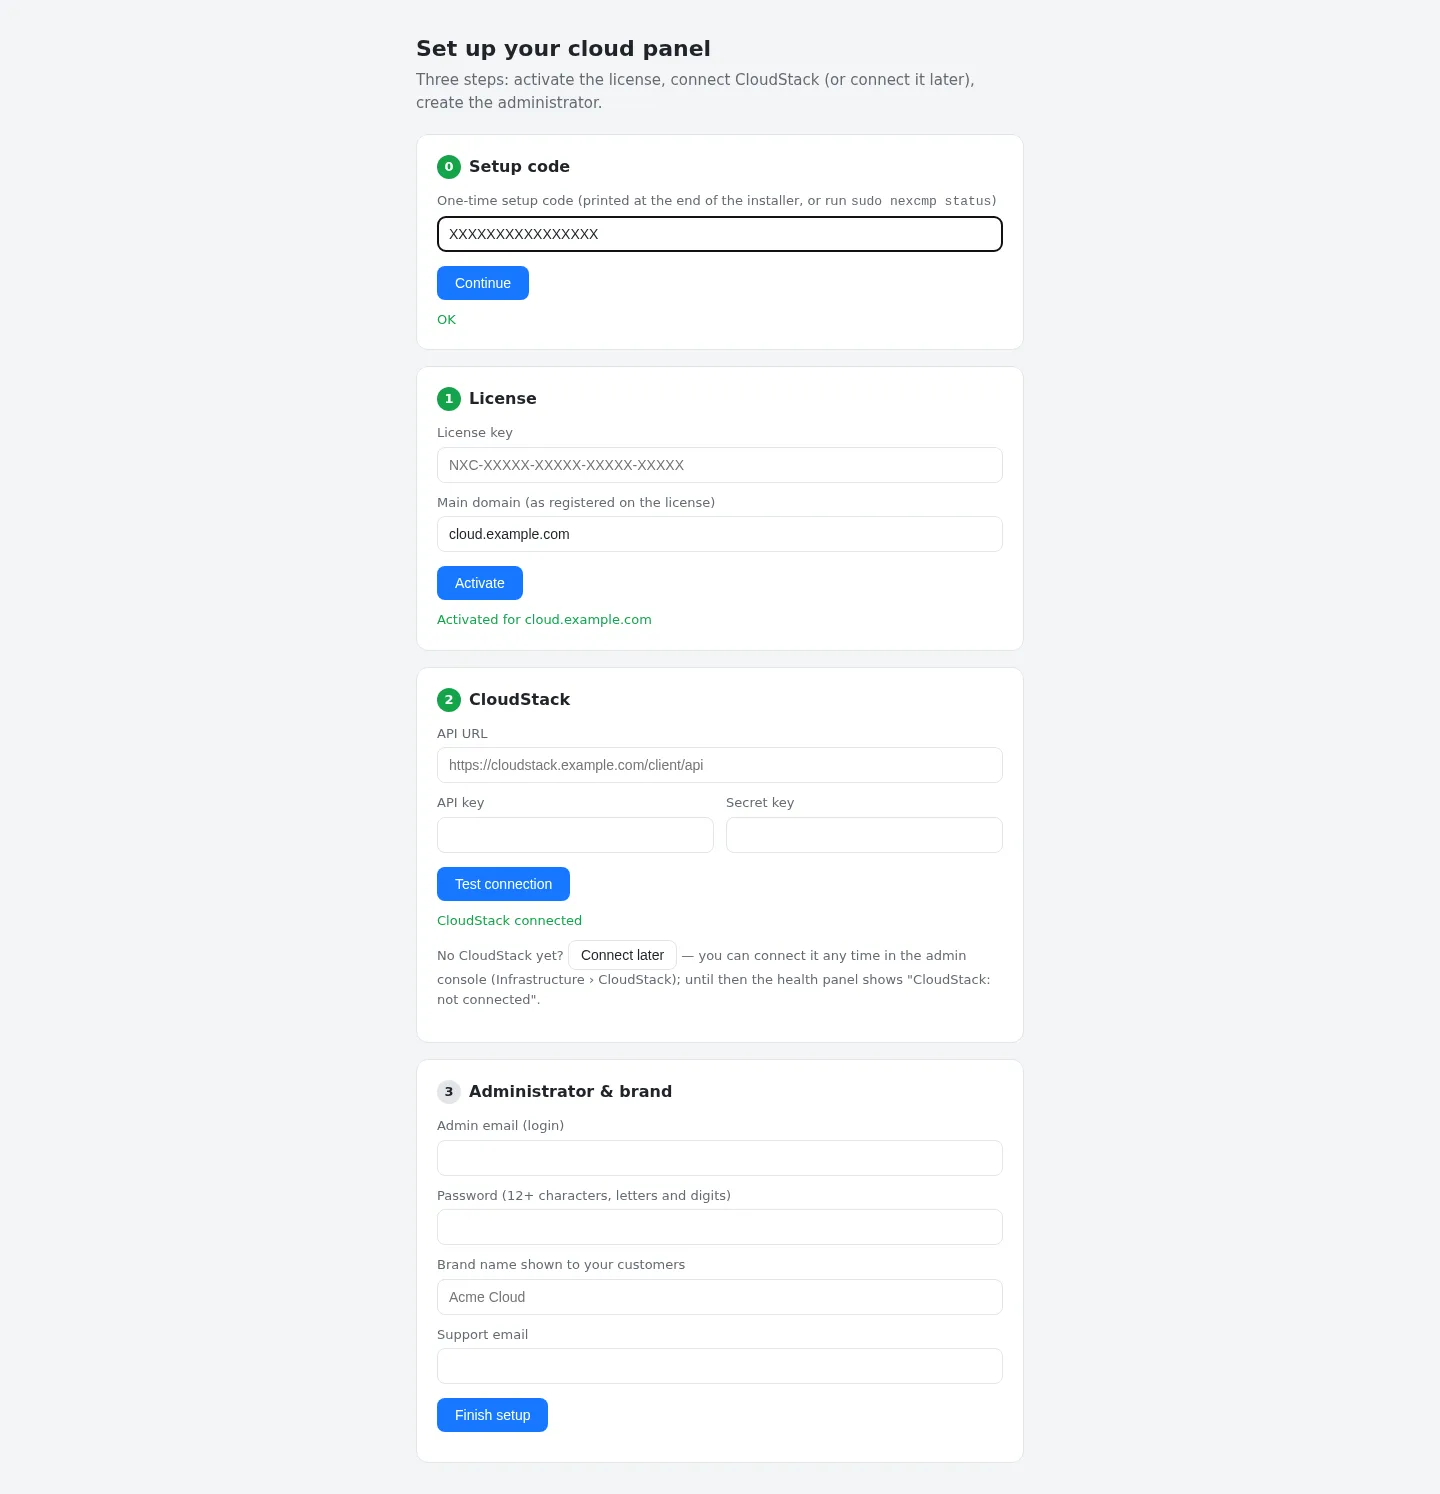
| Field | Value |
|---|---|
| License key | NXC-XXXXX-XXXXX-XXXXX-XXXXX — pre-activated by the installer, so this step normally shows "Activated for cloud.example.com" |
| Main domain | The domain registered on the license |
If the installer already activated the license, the wizard recognises it and moves on. Otherwise enter the key and domain and click Activate. Errors are shown in red — see Installation errors.
Step 2 — CloudStack (or Connect later)
You have two choices:
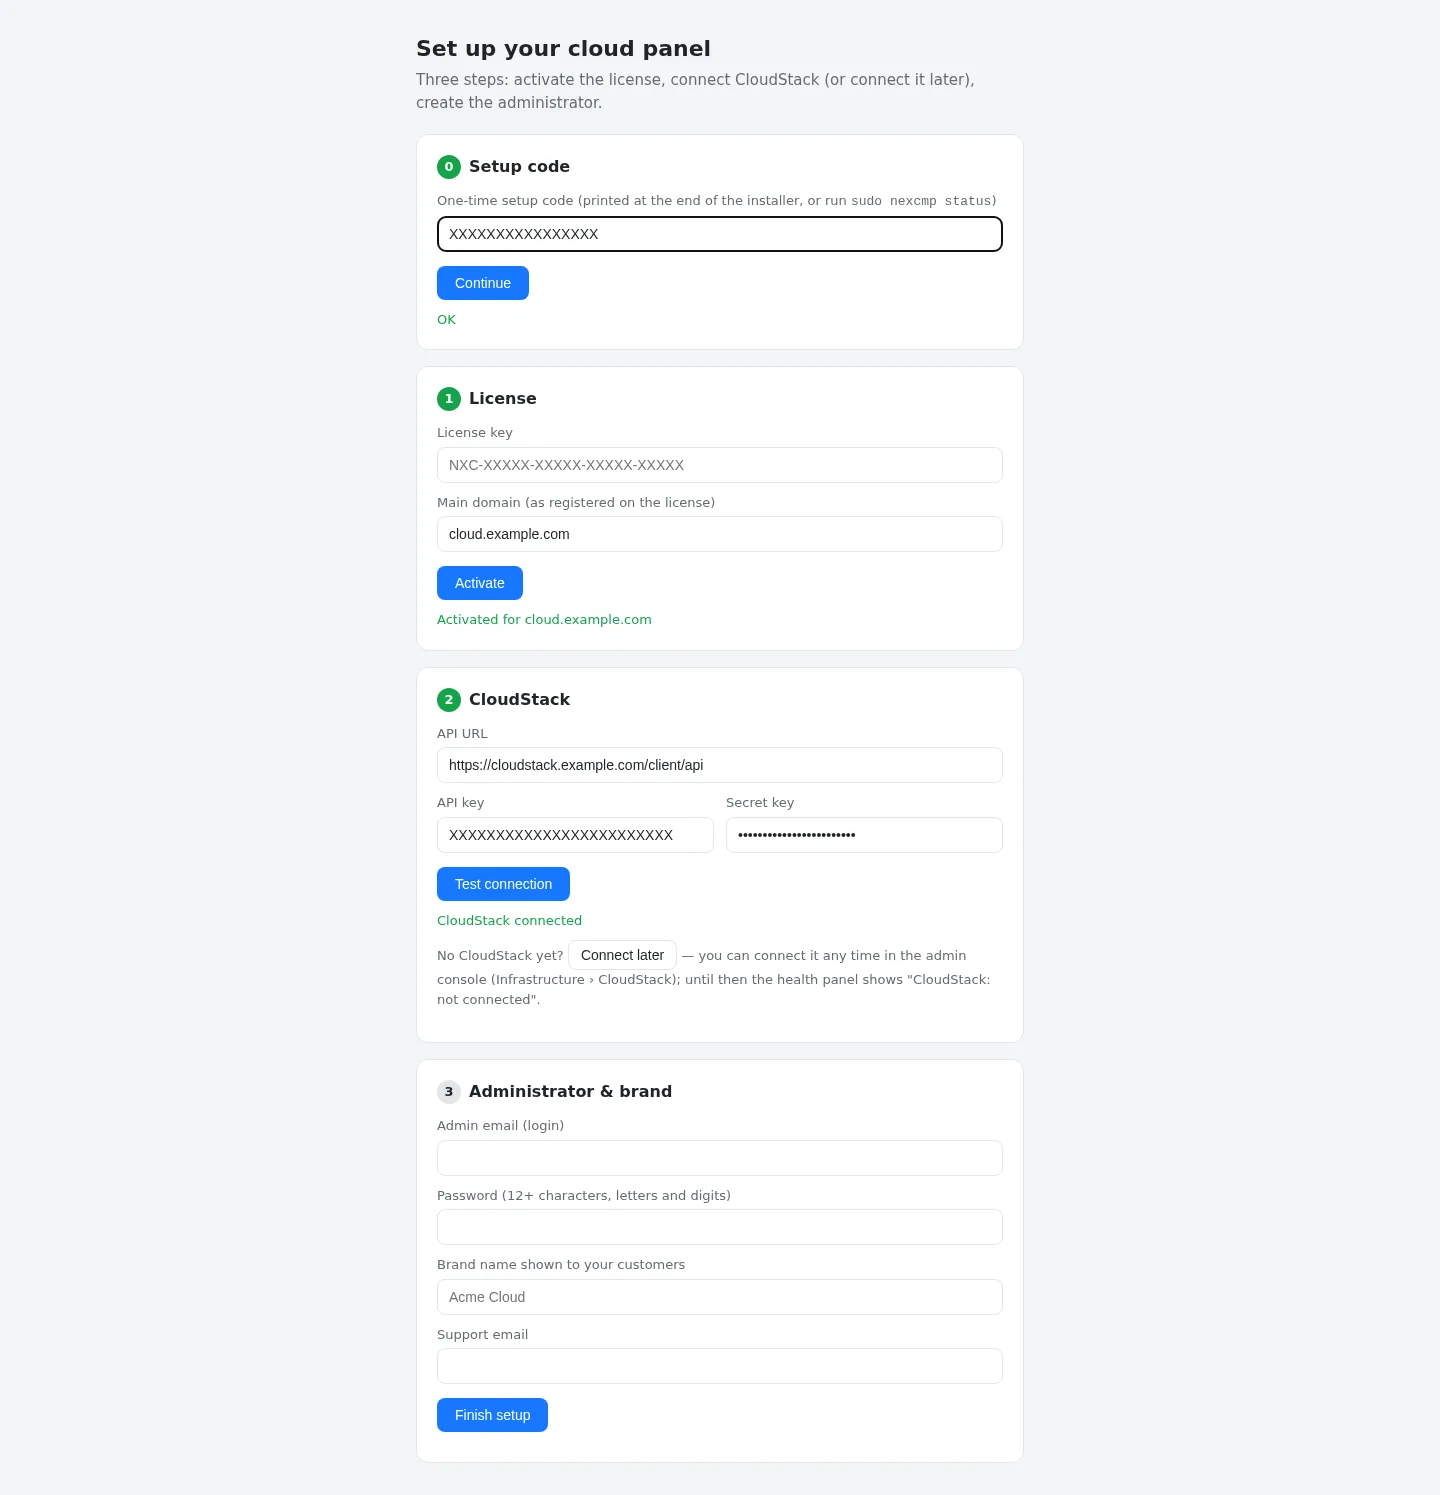
- Connect now. Enter the CloudStack API URL (
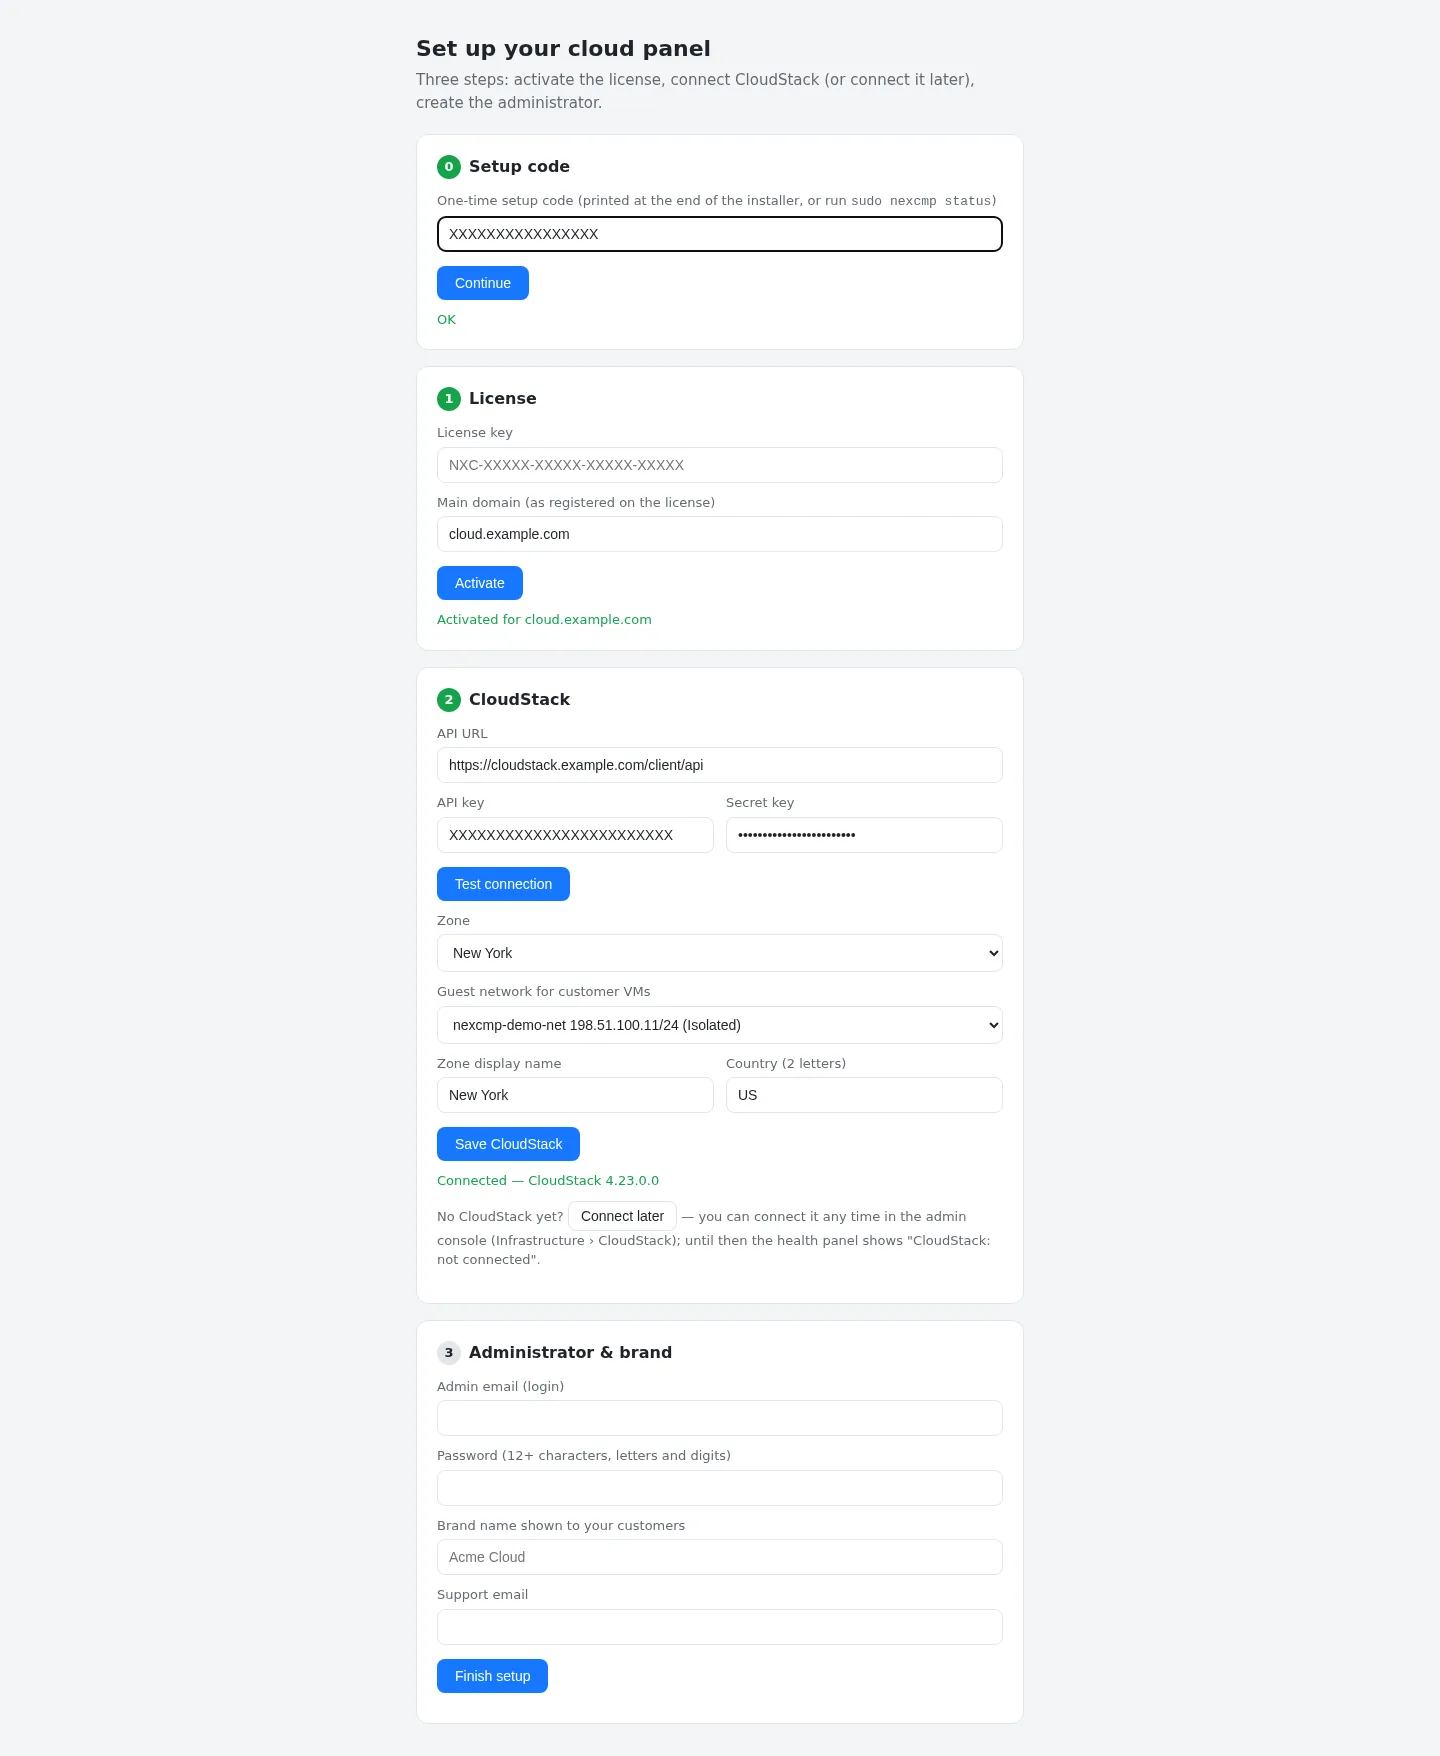
https://cloudstack.example.com/client/api), API key and Secret key, click Test connection, then select the Zone, the Guest network for customer VMs, a Zone display name and the two-letter Country. Click Save CloudStack. - Connect later. Click Connect later. Everything else works; you connect CloudStack or Proxmox VE afterwards under Infrastructure. Until then the health panel reminds you that no source is connected.
::: important Use a dedicated CloudStack account Do not use the ROOT administrator key. Create a dedicated domain and account for NexCMP and use its API key — see CloudStack. The wizard checks that the chosen network belongs to the zone and to the account of that key. :::
If you plan to use Proxmox VE only, choose Connect later and follow Proxmox VE.
Step 3 — Administrator and brand
| Field | Rules |
|---|---|
| Admin email (login) | Valid e-mail address. This is your administrator user name. |
| Password | At least 12 characters, with letters and digits. |
| Brand name | Shown to your customers (default "Cloud"). Up to 60 characters. |
| Support email | Defaults to the admin e-mail. |
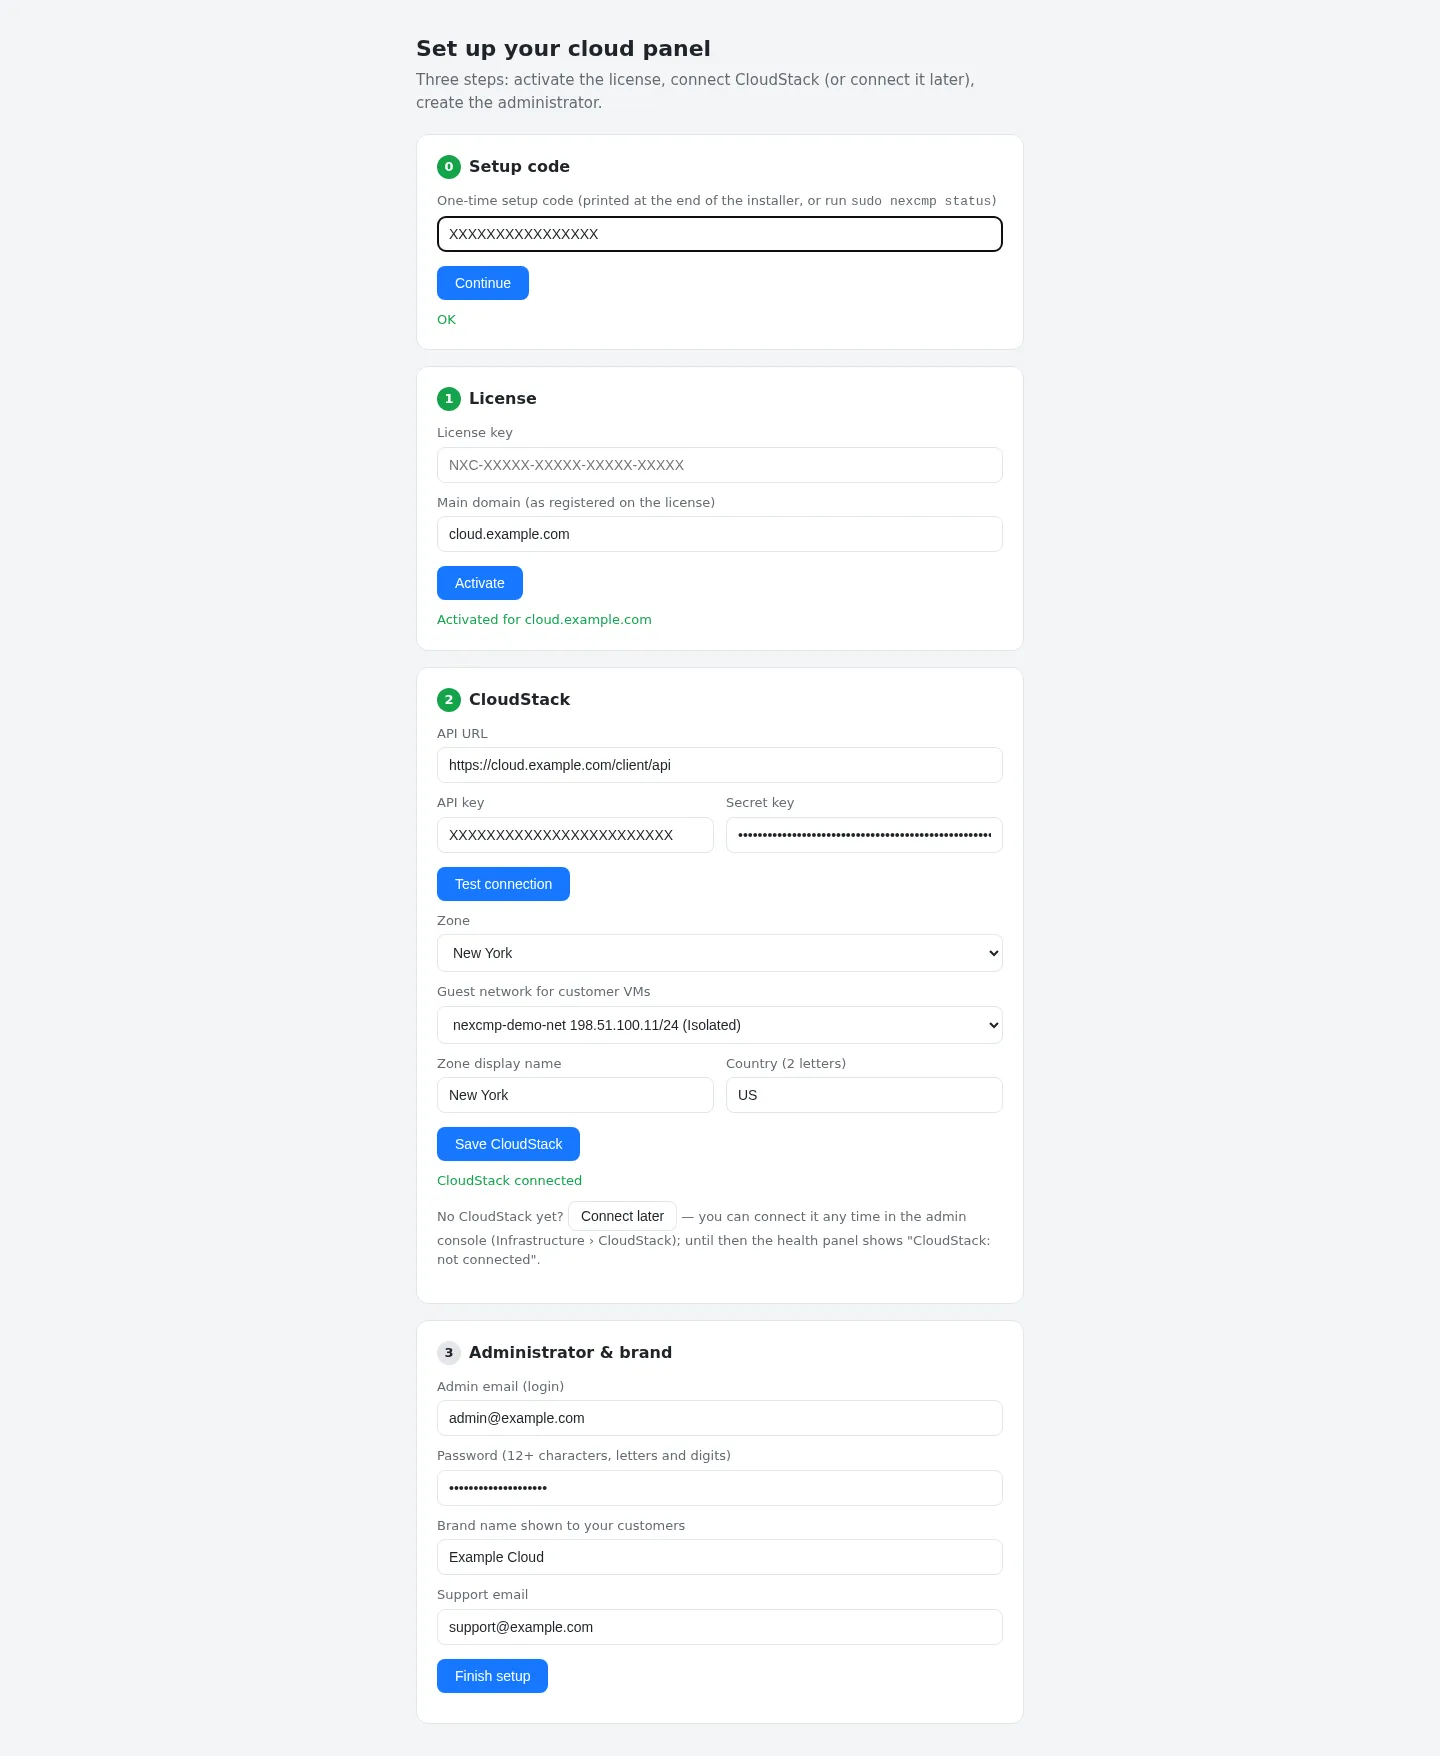
Click Finish setup. The panel restarts (about 1–2 seconds) and the page sends you to the admin login at https://<domain>/admin/. If that address does not answer yet (DNS or TLS pending), it sends you to / on the current address instead.
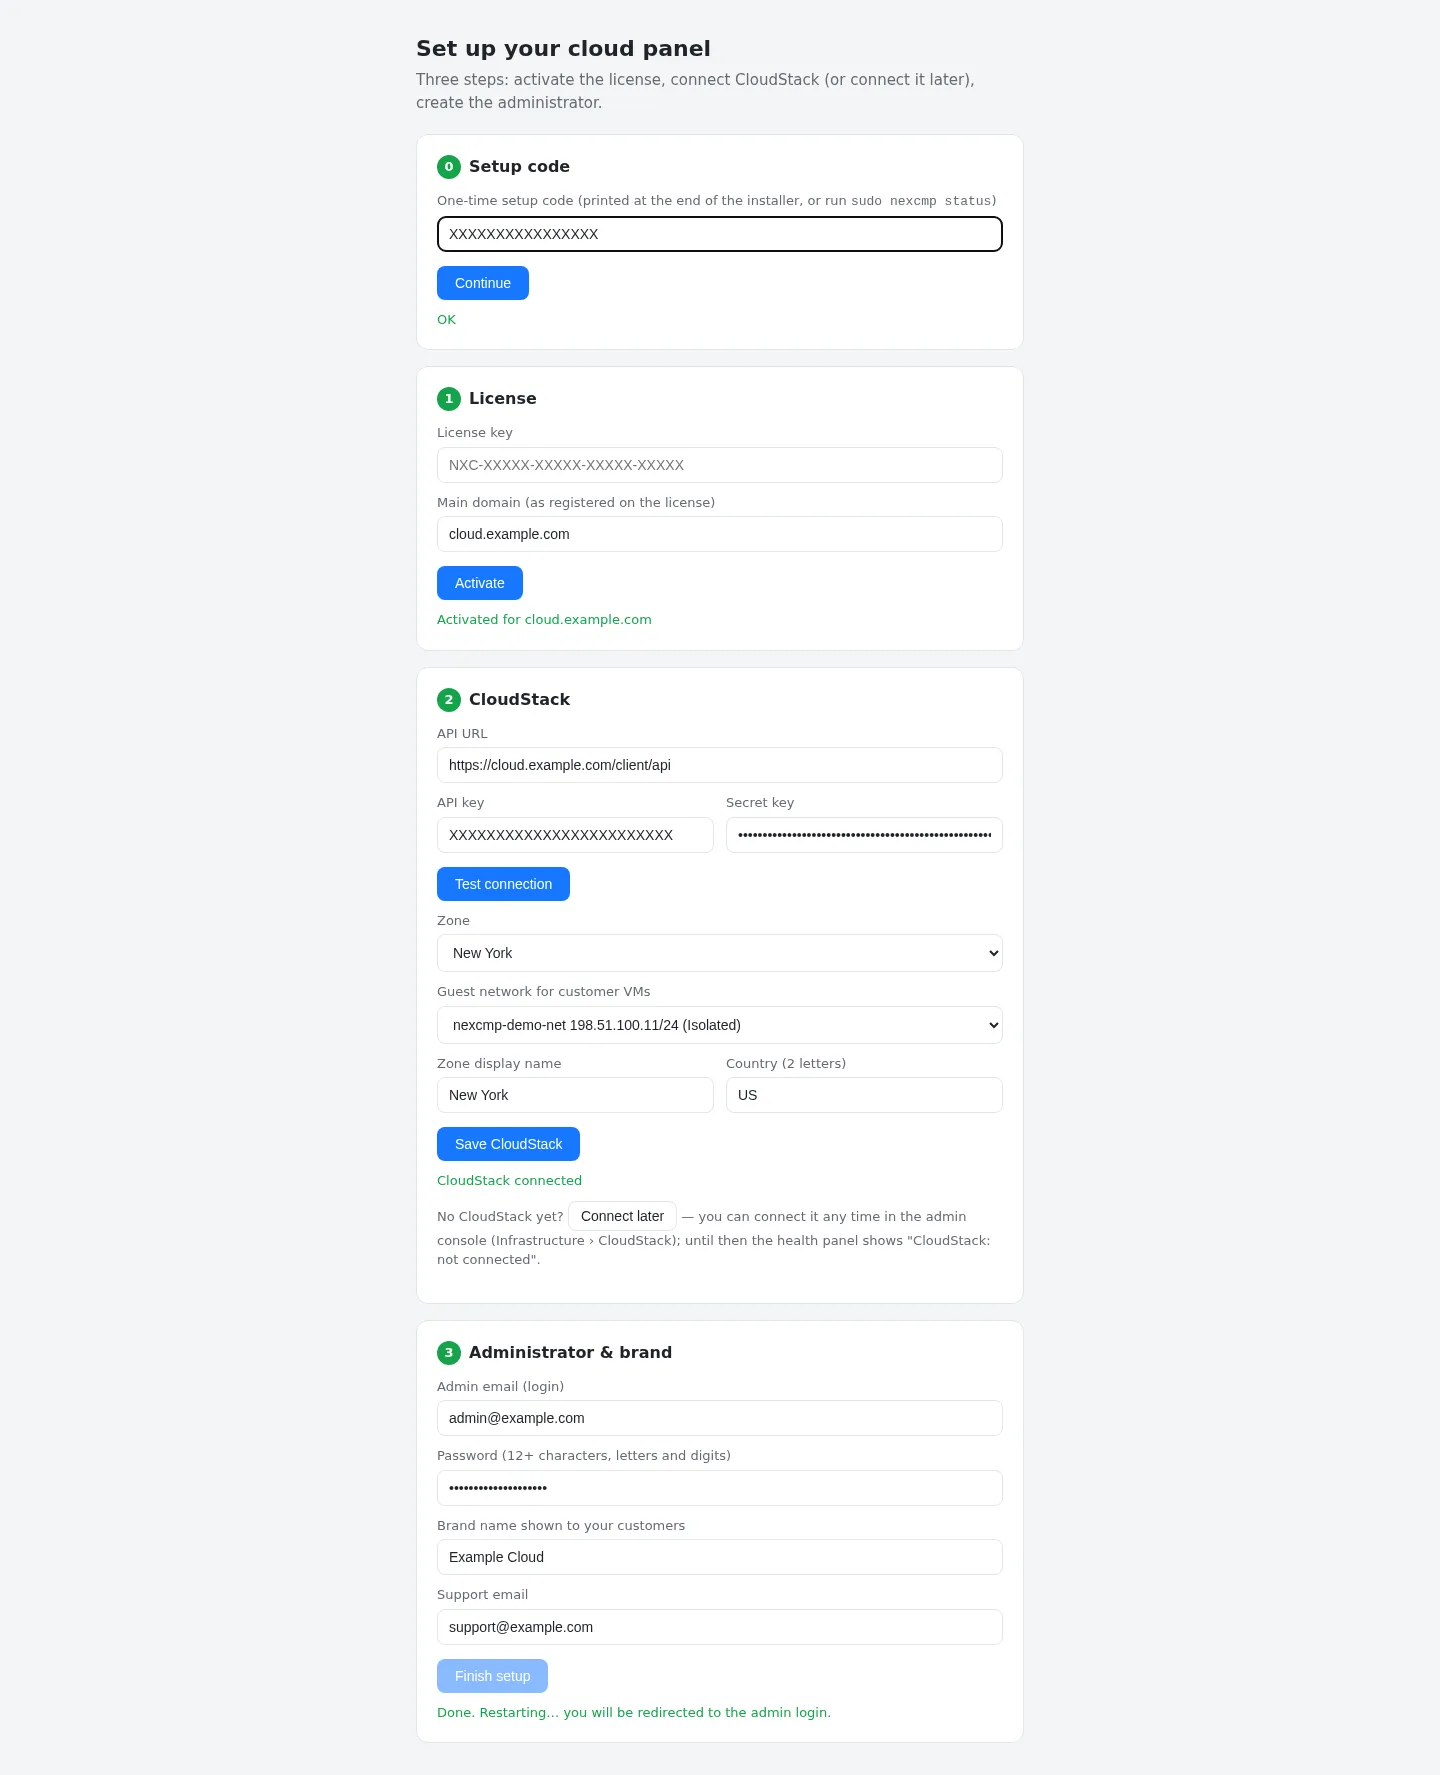
What the wizard sets up for you
- Brand name, site URL (
https://<domain>), admin URL (https://<domain>/admin), console URL (https://<domain>/console), support e-mail and sender name. - Default settings for the modules that ship with NexCMP: DDoS & BGP, AI and web SSH are off; bandwidth metering is on. See Modules.
- If you connected CloudStack: provider #1, its first zone, the guest network, and an operations key pair that is attached to customer VMs so you can support them.
Next: First login.